Project: Trampoline
August 25th, 2005 by: cheyenneWe tend to be do-it-yourselfers way beyond the point where it gets stupid. For example, spending 30 hours researching rope prices on the internet in an attempt to save $13, then taking over six months to purchase it anyway because we got so discouraged during the research process. We therefore happily justified purchasing a $500 sewing machine that will sew through 14 inches of solid concrete (for breakfast) in order to make our own trampolines (among other things).
In order to SAVE SAVE SAVE, we spent around 312 hours researching and agonizing over the various trampoline materials available out in the wide world, 678 hours trying to decide if we needed stainless grommets or just nickel-plated brass ones and where can we find the best deal on them. Another 820 hours, give or take 3 hours or so, were spent figuring out what rope was best, how to tie it off, how much was needed (depended upon how we were going to tie it off), what sort of trampoline edging material we wanted to use, and what sort of thread we needed to buy (this easily took up half of that 820 hours).
Here’s the list of materials used to make the trampolines:
– 6.5 yards 29-oz Trampoline Mesh, $39/yard
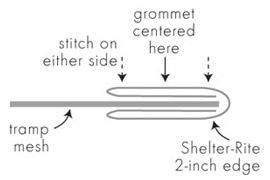
– 4 yards Shelter-Rite, $13.75/yard
– 250 feet dacron 3-strand line, 1/4 inch, $0.27/foot
– billion, I mean 200, #4 nickel-plated bronze spur grommets, $0.28 each
– 1 spool Profilin thread, $59
Total: $437.45
This total includes about a 10% discount for ordering all at once and asking nicely, but does not include shipping which was about $60. Gasp. The mesh is heavy. For comparison, we got a professional quote from multihullnets.com that came out to about $1500.
List of specialty tools needed:
– Sewing machine. Sailrite LSZ-1 with the large balance wheel. I don’t remember exactly what we paid for it, but we got a good deal on the demo machine at the Oakland boat show a couple of years ago. ~$600
– #4 Hole Cutter, $15.75
– #4 Die set for the grommets, $21.00
– Many instances of the F-word. Free!
Most of these things we got from Sailrite which is a good DIY resource. Some things can be found cheaper, but probably not after you count the extra shipping cost. We have a bunch of thread left over, but little else. The hole punch is on the small side to give a tight fit to the grommets. This was a bit of a problem when going through this many layers and it helped to ream out the holes first using a very expensive specialty tool (an old pair of pliers).
The reasons we decided upon this mesh over all other meshes out there were 1) we didn’t want the mesh to stretch out, 2) it had to be coated with vinyl in order to be UV/weather protected, 3) we wanted somewhat larger holes in order for water and air to go through (don’t need to be going airborne in a gust), 4) we wanted it to be sturdy so we wouldn’t have to worry about it chucking our anchor on it, and 5) we didn’t want black.
Edging was purchased to match and because it seemed pretty much bullet-proof. The thread situation was a toughie; the dilemma is that if you do not use UV-protected thread, it will break down in as little as a year and you have to re-sew your trampolines. This sounded like a pain in the ass and we hadn’t even tried to sew the anything yet (we are very glad we bought the fancy thread, I’ll just say that now). Unfortunately, the normal tough thread (non UV) is very cheap, whereas the fancy stuff, ‘Tenara,’ runs $150/spool. We finally found out that they had a competitor with far better prices (and smaller spools) and bought Profilin thread, also UV and weather resistant. Nickel grommets because we were so worn down with all the other decisions that we didn’t really care anymore.
The method:
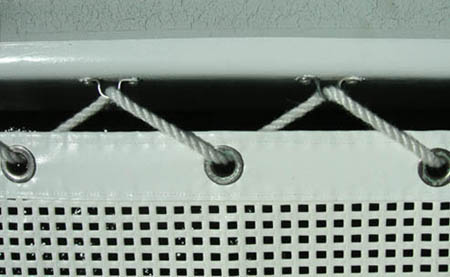
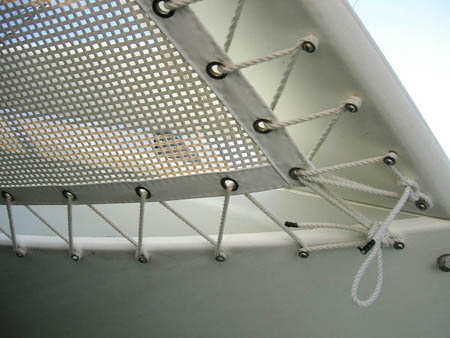
We brought the shiny new trampolines to the boat to be sure they fit (oh yes they did). Then we marked where to put the grommets. We decided upon the simplest tying method, which placed each grommet halfway between each pair of eye straps on the boat. Then Joshua pounded for a long long time. After that he pounded some more. Then he did the other side. Tying the trampolines onto the boat was a superfantastic pain in the ass and convinced me beyond doubt that the UV resistant thread was a good idea.
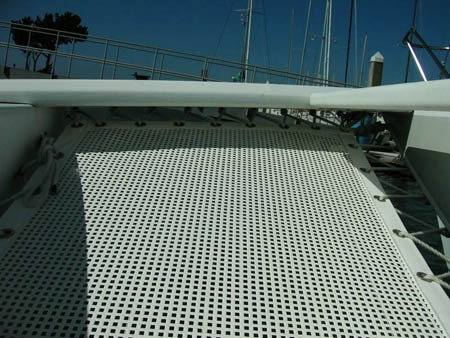
Here are the pictures of them on the boat; we left the ends of the ropes temporarily tied so we can allow the rope to stretch before tying it off more permanently. Actually, it really hasn’t seemed to stretch all that much and we can probably officially tie them off at any time.
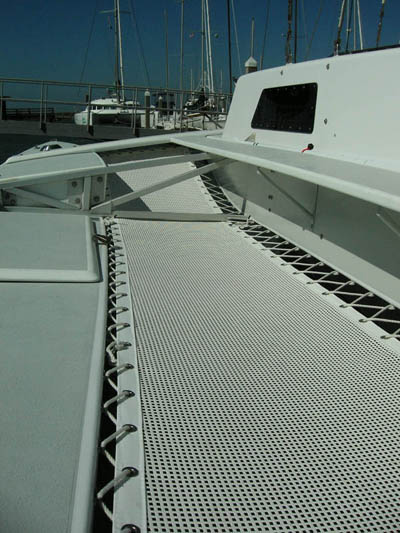
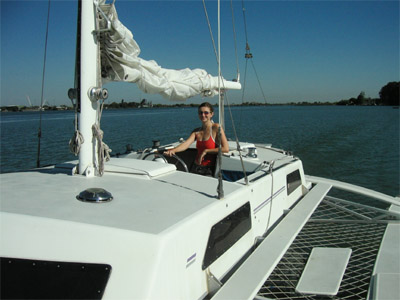
We are so not motoring here :)