First off, this being my first Let’s Cooking!! entry, I must lay out a few things.
I don’t follow recipes very well. Even if I’m the one writing the recipe, there’s no guarantee that it’s actually what I cooked myself to produce the fabulousness that inspired me to share. I don’t measure very well because I have no patience and am suspicious at such exacting ingredient amounts such as “one cup and two tablespoons.” You might be required to just figure out for yourself what “one glass of” or “the red bowlful” means. Sorry about that.
(If this irritates the bejeebers out of you, don’t feel alone; Joshua goes nearly insane every time “we” try to cook together from a recipe. If the man was in charge of the culinary arts around here we’d surely clutter up the boat with kitchen scales and the like.)
Oh, and ‘t’ means teaspoon and ‘T’ means tablespoon; ‘c’ means cup.
Stovetop “Naan”
(Don’t even waste time wondering why I put the “Naan” in quotes.)
Ingredient list (with modifications):
* 1t yeast (The first time I made this I used a full packet, which turns out has 2.5 teaspoons of yeast. Who knew. Nothing happened out of the ordinary as far as I could tell except it rose faster. The flavor was a bit on the yeasty side perhaps.)
* 2/3c warm water (110 degrees I believe is the proper temp to get the yeasties going.)
* 2c flour (2 cups of flour is a measurement I can totally handle)
* 1t salt (The first time I made it I didn’t actually own measuring spoons and so measured out what was probably 1/4t into my palm and tossed it in the bowl. It wasn’t salty enough; a teaspoon is a lot more than you would think. Second time I made it I had since purchased some cute-as-hell stainless nesting spoons from Cost Plus and so totally measured out one teaspoon and it was very salty. I’ll try it next with 1/2t salt domed; if not enough, a tad more.
* 2T yogurt (I guessed at the 2T the first time since I didn’t have the spoons; no discernable difference between this and the second time, when I carefully measured out two tablespoons of half and half, since I didn’t have any yogurt in the house.)
* 1/4c I think of ghee; 1/2 for the dough and 1/2 for the cooking (Not having ghee in the house, I used butter. Melted it on the stove. Since I didn’t know how many T were in a 1/4 cup, I guessed and used 1.5T butter. Far more than 1.5T of butter was used for the stovetop cooking–Joshua is willing to relinquish exact measurements where butter is concerned and was in charge of “charging” the pan with butter for each side.)
The Method:
Make the water warm but not too hot (I stick my finger in it and arbitrarily declare it 110 degrees); carefully add the yeast and whisk to dissolve and keep from clumping together, which is icky. Cover (why? who the hell knows–the directions said to do this and I had a cover handy so I covered it and probably will cover fizzing yeast until the day I die). Mix the flour and salt in a bowl. The yeast is supposed to sit for 10 minutes before being added; the first time I made this I probably waited 12 minutes and the second time, 8 minutes. Add the yeast/water mix and the butter/ghee/olive oil/whatever and ‘nice and mix, nice and mix.’ Turn out onto lightly floured board and knead for two songs (if you are listening to punk, make that three songs and if classical, make that 5 minutes). Put dough in greased bowl and let sit for a couple of hours (or until dough doubles in size) in a nice warm place. Ahhhh.
When ready to go, knead for another two songs and separate into 6 cute little doughballs. Pull/smack/roll/squish these into naan shapes and you are ready to grill. Now the recipe says “grill” or broil or something. We have no oven onboard so this is a stovetop recipe for me. Heat CAST IRON pan to hot but not smoking hot (med or so); grease liberally with butter and toss on the naan. Sizzle/steam/yammy smells.. (black burny dots are okay–a little char taste is a good thing I think, just not too much). Flip when it seems right (you have to use your sensory perception here). Take off when done. Experiment with dough thickness and doneness the first time you make it since you have six tries. Remember which is the best for next time.

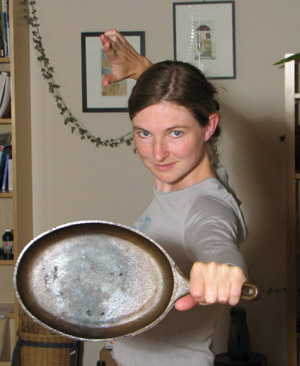
Here’s the official stovetop bread pan: a cast iron “fajita” pan I got from goodwill that had never been used. I spent a shocking amount of time sanding down all the bumpiness because I wanted a smooth surface and then seasoned it with bacon grease. It’s just the right size and doesn’t weigh a freakinjillionbillion pounds like the larger skillet cousin.


